Do you enjoy receiving holiday photo cards, but struggle to get one out yourself? Maybe it is always on your holiday to-do list, but the task just seems monstrous and time consuming so you slide another year without sending a card. Change that this year and create a holiday photo card with these 5 easy steps.
Select the Photo(s) for the Card
The first step to create a holiday photo card is to select the photo(s) you want to use. Pick photos that tell your story or from a family highlight that year.
Some examples of photos to include may be from the following:
- Family vacation
- Other holidays that year
- Kids activities like a dance recital, school play, or sporting event
- That first day of school photos by the front door
Select clear, light, and bright photos. Make sure they are not blurry or dark. If you choose one photo for you card it will be larger and easier to see the detail. On the other hand, if you want to include 5-8 photos they will be much smaller on the card. So make sure the people are large on the picture so they are easy to see.
Lastly, as much as I love seeing pictures of my friends and family’s kids, I do also enjoy seeing a picture of the whole family together. It is nice to see the adults too:)
Select the Photo Card Template
The next step is to choose a template to create your holiday photo card. There are tons of options out there and at different prices. Some examples of online stores to use is Walgreens, Shutterfly, Walmart, Minted, and Tiny prints. If doing your holiday photo card online is not an option, stores like Walgreens and Walmart have an in-store option.
Personally, I create my holiday photo card online with Walgreens. I like Walgreens for 4 reasons:
- I house all my photos with Walgreens. This way whenever I need a print of photo, to create a card, gift, or photo book I have access to all my photos in one spot.
- With housing my photos at Walgreens.com I get email exclusive deals where I get 40-60% off their photo card price and other amazing photo print, gift and book offers.
- Walgreens has huge variety in card options, styles, and prices.
- There are lots of locations to choose from to pick up my holiday photo cards and save money on shipping. So since I live close to a Walgreens, I typically pick them up. Furthermore, they offer a same day pick up option so usually my cards are ready for me in a couple hours. For a few dollars more they do have a shipping option.
Once you know who you want to do your photo card with select a template that has space for the photos you want to use. There are many options to choose from including size, card material, front or front & back, and all of these come with a price difference. Pick an option and go with it. The sites usually have pretty good tutorials with steps to complete the card if you need help.
Another bonus of creating your card online is you can usually save your template and use it again another year. I know with Walgreens I can do this if I choose. To make creating and sending a holiday photo card even easier use the same template and change the pictures.
Create a Personalized Message
Once you have your template selected and photos on the card, next comes “signing” or writing the card. There are many ways to do this as well. You can keep it basic and sign the “enter your last name’s”. Another option is writing out each person’s name. I prefer seeing each person’s name so if other people look at the card and they don’t know them, they can match a name with the face.
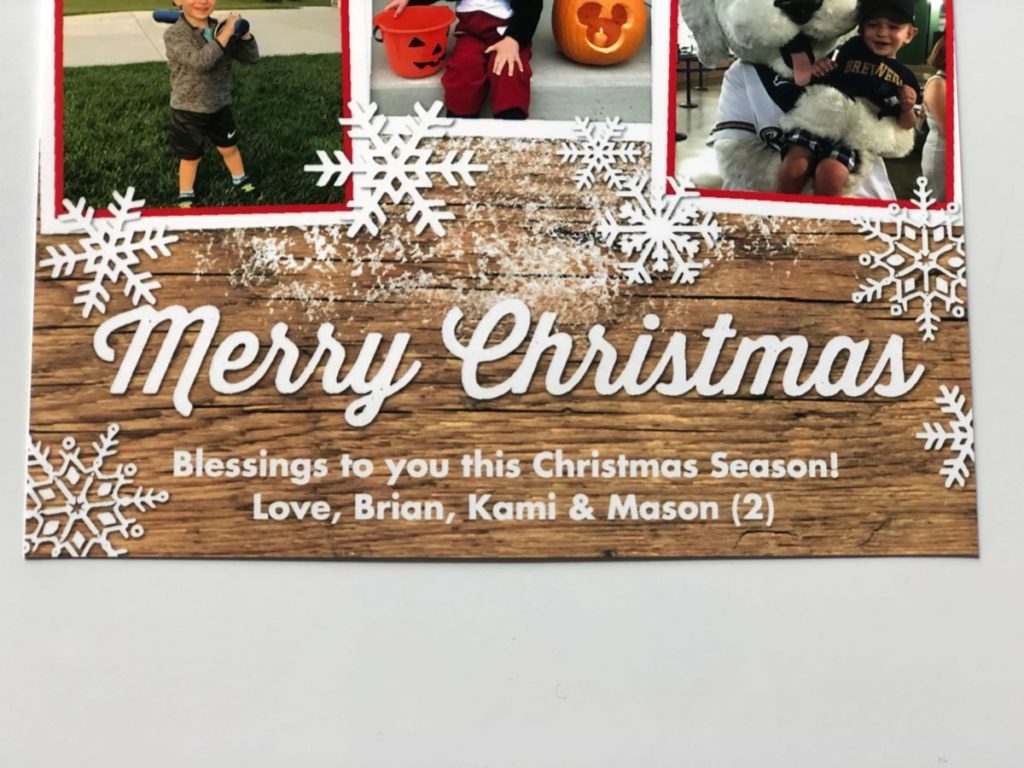
Besides seeing each person’s name, I love when people put the kids ages in parenthesis behind their name. Sometimes I forget how old everyone is and this is a good reminder.

It can be hard to fit on a photo card, but I also love when people write a little bio of the family from the past year. The back of the card is a good place for this. Some people I don’t talk to on regular basis so I enjoy reading the family’s highlights from the past year.
Make a Spreadsheet of Card Recipients With Notes
Once you have your card ordered you need to prepare to send the amazing holiday photo card you created. To make this easy for every year after the first, make a spreadsheet of your card recipients. This way you have everyone’s mailing information in one place and notes on past years. See my sample below:
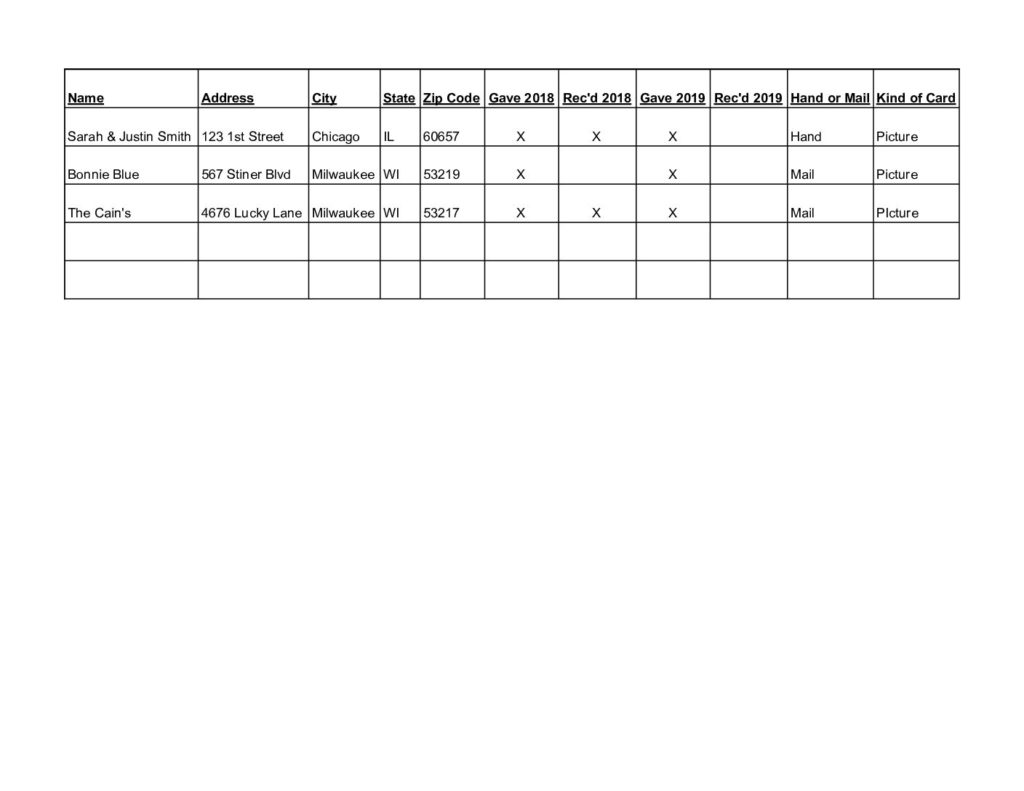
For the name portion you can write out everyone’s first/last name or if it is a family with more than 2 people you can simply write The “So and Sos” instead of listing each person’s name.
After the address information is all filled in, take notes each year on your holiday cards. Scroll to the bottom of the post to get your 2019 Christmas Card Address & Tracking Spreadsheet. This will help the following years and save time trying to remember what you did. On the spreadsheet each year I add a new tab at the bottom with the current year so I can look back to previous years if needed. If you use my free printable, just keep a copy of each year’s sheet.
Next, I copy and paste the contents into the new year’s spreadsheet. Then I make my appropriate edits for that year. I include who I gave a card to last year, who I received a card from last year, and who I will gave to this year. After Christmas I will take notes on my spreadsheet who I received a card from this year.
Complete Holiday Photo Card Address Labels and Return Stamp
Recipient Address Labels
Once you have all your recipients addresses you are ready to create mailing labels. There is a couple different ways to do this. You can do a mail merge, and print labels that way. You can also manually type in a label the family’s name and address and save them so you have for the future. Lastly, you can manually address each envelope. Personally I like to use mailing labels as after the first year it is easy to print them out each year.
During the year if people move and I get address updates I enter them into my spreadsheet in addition to my address book. That way when it comes time to do cards, I have everyone’s correct address ready to go.
Return Address
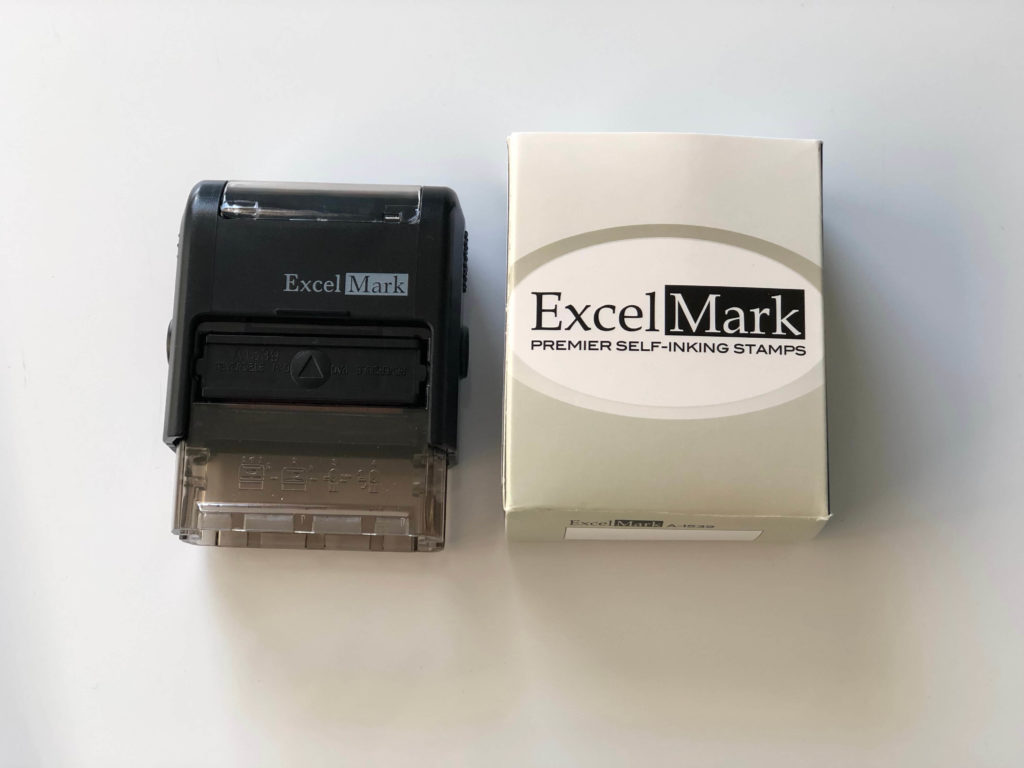
To include a return address I have found it easiest and fastest to get an address stamp. There are different places to get this, styles, and costs. I purchased a basic one. It cost me less than $12 and I have had it for 3 years already. This way there is no hassle of printing out labels or running out. I actually use my return address stamp anytime I am mailing something out.
Once you have your envelope addressed and return address on there, add the stamp and you are set to go. Tip for stamps: I buy forever holiday stamps in bulk so I only have to get stamps every few years. Saves a trip to the post office and I know they will work being a forever stamp.
Final Thoughts on Creating and Sending an Amazing Holiday Photo Card
Now after 5 easy steps you have created and sent out an amazing holiday photo card this year. The best part is you created a card template for future use and a spreadsheet to track and get your cards out super speedy for years to come.
Get your 2019 Christmas Card Address and Tracking Spreadsheet in my free resource library by signing up below.
Leave a Reply